Tuesday, July 29, 2014
New Website for Lucy's Inspired
If you have landed here and not sure where to go. Hang out, look around, but this is the past and it's gonna stay here. If you want to keep up with my jewelry line, Lucy's Lockets, you should head over to my new site where you can shop, get inspired and read a few adventures of making, flipping, styling, selling, creating, traveling and just a whole lotta fun! Hope to see you there! www.Lucysinspired.com

Friday, March 28, 2014
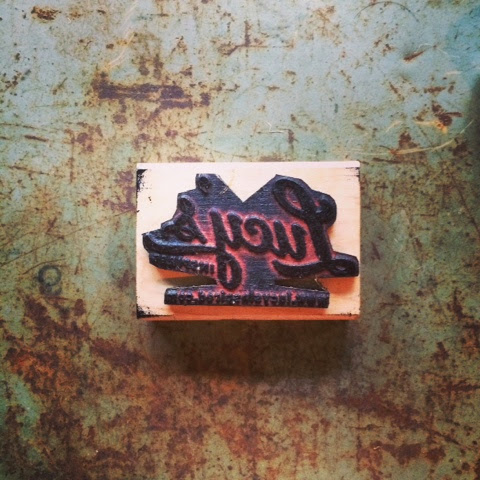
Stamp My Logo
The other thing that happens almost immediately after is someone telling me my business card, because I just handed them one to check out my website, is they tell me it's the coolest business card they've ever seen. They want to know where I had them made. I love my business cards and I get to say, I made them!!
I love the fact that everything I do with my brand is hand made. I do not make the burlap bags because they are like 25 cents each on U-line.com. I do stamp them, though!

To make the business cards, I cut out the shape from extra thick chipboard from Accucut, because I love extra thick chipboard. It makes my business card feel like a lot more than a business card. Then, I take my stamps that I ordered from SimonStamps.com and a pad of Stazon ink and start stamping away. I have one stamp of my logo and I had a graphic designer set up all the info on another .jpeg that has my email, phone number, website and all the social media buttons. So, I stamp the logo on one side and the other info on the other!

It's super easy to order the stamp. You need a .jpeg file of your stamp image. Mine is black and white, so that's easy. If yours isn't, it will tell you that it's going to change it to a black and white image for best results. The color will be the stamp pad you choose!! There are lots of sizes to choose from. You need to determine what you are stamping and if you need a business card size or different one. I am ordering a smaller logo stamp to stamp my logo and website address on the tags for my Lucy's Lockets.

Currently I stamp my business cards, my burlap bags and tags for packaging. I also stamp the back of the Lucy's Lockets cuffs. When I drop my kids off at ski camp, I stamp their foreheads. (haha, just kidding, but what a great idea, huh?) It's seriously the best $25 I've ever spent!

When you see my brand, I want you to know it's mine. I use kraft colored paper and burlap bags. I have a casual, industrial type brand. I think it's making it's way for people to know it when they see it. I love that I've had several friends text me and tell me they've seen Lucy's Lockets in stores. They felt like the jewelry was familiar and then they saw my name on the tags! Branding is so important if you are working on developing a business. You have to teach the consumer to recognize it when they see it. Think of all the big brands. You may not even see the name of the brand, just the colors and you know. i.e. McDonald's, Coca-Cola, or Apple to name a few!
I hope this helps you determine whether a stamp will work for you. I honestly picked a stamp because I couldn't make up my mind on what I wanted my business cards to look like. They are so expensive to buy boxes of them and then change your mind on what you want them to look like. My way takes a little extra time, but I have never handed over a business card that someone didn't say they loved it or that they have seen this before (and it was mine)! It's the first impression. Make it a good one!

I've helped a few other companies with stamps. Alan Matthews Photography uses one for his marketing packaging. Southern Accents Architectural Antiques uses them for many uses now, but I started by stamping on blocks of wood to use as ornaments, calling cards, coasters or whatever cool use you can come up with.
Wednesday, March 12, 2014
Lucy Lockets by Lucysinspired

I threw everything on the table and they started picking out personal pieces immediately! Now, that felt good! I love when someone wants to wear a piece themselves! That has to be the best affirmation. Once they had their own stash tucked away, they picked pieces for the store. It was such a joy meeting everyone that works there and getting their feedback on different styles. Of course, the prism necklaces are the most popular. I think they picked up 17 prisms on leather and took every prism on a chunky chain that I had. There's some talk about a housewife from Beverly Hills that wears one? It's not mine, but apparently, it's very similar!!
The workshop has been busy and thankfully, I have had several locket elves helping me out in the last few weeks! I thought I would share a few pieces of the collection I've sent to Tuscumbia and Fairhope this week!
Leather cuffs have been so much fun to make. I added them into the line last summer. So many options and all are one of a kind!

This escutcheon is a gorgeous brass. I added a key, as always and loved adding these two links from a vintage lighting chain.


I really can't believe I let this one go. I LOVE it so much!! That piece that looks like a fleur de lis is a great color and makes this one look full of treasures!


This spring heart will be great for St. Patrick's Day!

Another group of leather cuffs. That giant disc in the middle? #swoon


Friday, February 21, 2014
Farmer Country Club
I have done so many fun projects with architectural salvage. It's crazy to me that I haven't done a post on each and every one! I guess I can do a quick roundup. I have built 7 houses, renovated 1 and am in the process of renovating the second, oh and building another! It's a hobby and a business. My husband is the best land/lot finder in the state of Alabama. So, if you are in the market to build a house, he can find you a piece of property that will knock your socks off! Or you can just let us find it, build a house on it and then you can buy it from us!


The keeping room, where we lived ALL the time holds lots of memories. We sat in front of many a fire in this stone fireplace with that old beam as the mantel.

Ahh, the back of the house. We lived out here. The doors you see open up folding to one end. My kids were always in the pool and that swing? My husbands grandfather, Papa, built it for us! This is the best place in the whole house!! There is antique brick framing the arches and I can't tell you how many times we refinished that floor. It was not wood that should be outside!!!

My bathroom. Oh, this place was a close second to favorite places in this house! That copper tub? Yes, please. I could sit there and read a book forever! The best thing about this tub is the water NEVER got cold! We used the hickory for the cabinets and the bead board on the ceiling. I love that crown molding, too. This color is a lot brighter in this picture than it was IRL.
 These pictures were from Instagram, so I apologize for the grain and the words! Our bedroom was 4 steps higher than the main floor of the house. I took this picture in the "sitting area" of the room that was level with the rest of the house. The banisters were literally found on the side of the road. Metal and the perfect patina. I had the railings made at a local ironworks shop.


Our first home was built in 3 months. Basic floor plan and not many extras. High gloss trim, maple cabinets and oak flooring. Don't get me wrong, it was great. We even had a bay window in the kitchen that overlooked the woods and it was perfect! Emma was born there and when she turned about 3 months old, we moved into our second home. The lot was bigger, the house was bigger and I got crazy with the paint colors. This was a big open floor plan, but again, not a lot of extras. John Connor was born here and a few weeks later, we moved into our third home. We had built-ins in the living room, slate in the kitchen, we even added on a bonus room so there was a cool, brick wall! All of these houses were build as quick as possible, live there a few years and find the next "best lot ever". The fourth house. Oh, that fourth house. I still think about the pool and the tennis court. You can see a little of the front of the house here.
But, it was the antique bricks from Chicago, the beams that were milled into 5-6" wide heart pine flooring and the trough from France in the powder room that make me miss it.
 |
| This trough was from France. We had a metal base built as a stand. |
As you walk in the front door, you see one of the beams that the we used to mill the floors. This one had a lot more paint on it and they talked me into sanding most of it off. I learned early on to go with my gut on things I like. The contractor for this new house will probably hate me. (wink) Those are the bricks from Chicago. You also see one of my favorite things to collect, foundry patterns.
Walking into the living room, you will see a wall of doors that open onto the back of the house, but turn around and you will see the other side of that brick wall and John Connor's first deer hanging above the mantel. The ceiling was clad with hickory planks. You can see a smidgen of walnut trim that we used on both sides of this room. It was from a house built in the late 1800's. The mantel was a piece left over and you can see the gorgeous detail that goes all the way across. You can see a few more pics here.
Moving into the kitchen, we pulled out all the stops. The cabinets were custom built from hickory and we used a red stain for the top cabinets. I love the lead glass across the top, too. The bricks were split to create a veneer for the backsplash. You can see a small piece of red granite that was amazing. It is surrounded by terra cotta tiles that were in boxes in the bottom of a church basement that was being cleaned out. (jackpot!) We used the same hickory for the bottom cabinets, but used the bead board side for the doors and just a clear coat to enhance the wood. Our kitchen table was a piece of granite attached to the island. Lots of homework and creating happened at this table!
The keeping room, where we lived ALL the time holds lots of memories. We sat in front of many a fire in this stone fireplace with that old beam as the mantel.
Ahh, the back of the house. We lived out here. The doors you see open up folding to one end. My kids were always in the pool and that swing? My husbands grandfather, Papa, built it for us! This is the best place in the whole house!! There is antique brick framing the arches and I can't tell you how many times we refinished that floor. It was not wood that should be outside!!!
My bathroom. Oh, this place was a close second to favorite places in this house! That copper tub? Yes, please. I could sit there and read a book forever! The best thing about this tub is the water NEVER got cold! We used the hickory for the cabinets and the bead board on the ceiling. I love that crown molding, too. This color is a lot brighter in this picture than it was IRL.
John Connor's room was so fun!! We pulled out all the stops in here. The tin was from an old barn that was torn down from our camp house. We designed it around the size of this hand turned bed.
I will have to dig up more pictures from the rest of the house. It was a lot of fun to build and I'm really looking forward to working on MoonGlow!
Wednesday, February 19, 2014
The Day We Almost Died in the Exumas
April and I didn't want to waste our last day at Fowl Cay and we decided to go down to the beach for a few hours. She wanted to master standing on the paddle board. I was going to paddle around and look for sea turtles.
The water was a little rough. The wind was blowing in from the east and it made little, tiny waves in our little cove of water. It didn't look too bad, but on the paddle board it wouldn't have been easy. I suggest we get in the kayaks and go around the island. It's not big. The kayaks are easy. We will go with the current and maybe, just maybe the current will be the same all the way around!

I totally talked her into it.
She thought it was a good idea…at the time.
We start out and are smiling and talking about how we can't believe we have to leave. It's so amazing and the water is so gorgeous. We see JR, April's husband, at our place and he waves. April tells him our plan and he smiles and nods…she actually said, jokingly, "We are kayaking around the island! If you don't see us in a few hours, send someone to look for us!" She was joking….
We get to the first set of little jetties. Cute little rocks piled up. The current will change when we go over them, but it doesn't look too bad. The kayaks are so easy. I'm sure we can make it and when we get around the corner, the current will probably change again…or it will be all smooth and lake water like. I'm sure of that. Smooth water will be right around the next corner.
Wait. What is that? April, are those white caps? Are we about to be in the full on fight of white rapids right here in the bahamas? Ok, just keep calm. It will be fine. We can do this. It's too late to turn around now. We are so close. Look, there is the inlet and we will be back to where we started.
Hey April, "Are you moving? I'm barely moving! This current is strong!"
I'm in my mind telling myself that this is great exercise, I'll probably be sore tomorrow, I can't wait to get to the shore. Will we ever get to the shore?
We have to go all the way around, there isn't a beach on this side. It's all rocks. Keep going, we've got this.
We finally make it to the pass. The problem with the pass is the current is meeting in the pass. There are boats that come through the pass….with motors. There are waves. Big waves. The waves are pushing us where we want to go, right? Wait. I'm turning around backwards. April is tipping. DO NOT TIP IN THE PASS!!! Get out of the pass! If we get really close to the rocks, we can sneak through. If a boat comes through, we ram into the rocks. What do we do. Get away from me! If we bump each other, we both go in. OMG, I'm nervous. She's panicked. She's using her panic words. Just get out of the pass!!!
She thinks it's a good idea to go to the pier. Hello? How will we pull this heavy kayak up onto the pier? I can not do that! There's a little piece of sand over there and what looks like a smooth concrete area that is just big enough to pull up a kayak. I'm sure that's not what it's there for….until today.
She pulls right into the right spot. I am 10 feet down the bank where there are lots of sharp rocks. I keep slamming into the shore and start to worry that the kayak will be damaged by the rocks. What if I damage the kayak? I would feel terrible! I finally get out of the thing and start dragging it across the rocks that I'm also walking on with my tender feet. I look up and April is out. Her kayak is out. She's pulling it up onto the driveway and I'm still not sure I can get mine up there. She comes down and grabs it and pulls it onto the land and then goes back to get hers out of the way. I FINALLY got it out of the water.

Now what? We are both in our swimsuits, wet hair and no shoes. We have to tell them in the office. We go in and tell Grant our brilliant idea of kayaking around the island. We're laughing and smiling…he's not. He asks how far we made it and he's jumping up out of his chair with the radio in hand. I can get the guys to get them (panic), where are they? We proceed to tell him that we got them out of the water and onto the land. His whole face and shoulders relax and he smiles this really big smile. He thought we left them in the water and they were just floating along in the caribbean!! We saved the kayaks and our lives! We didn't die and the kayaks are on the shore! Celebration!!! Then we walked all the way back to the beach with no shoes and only our swimsuits on. We were alive.

The water was a little rough. The wind was blowing in from the east and it made little, tiny waves in our little cove of water. It didn't look too bad, but on the paddle board it wouldn't have been easy. I suggest we get in the kayaks and go around the island. It's not big. The kayaks are easy. We will go with the current and maybe, just maybe the current will be the same all the way around!
I totally talked her into it.
She thought it was a good idea…at the time.
We start out and are smiling and talking about how we can't believe we have to leave. It's so amazing and the water is so gorgeous. We see JR, April's husband, at our place and he waves. April tells him our plan and he smiles and nods…she actually said, jokingly, "We are kayaking around the island! If you don't see us in a few hours, send someone to look for us!" She was joking….
We get to the first set of little jetties. Cute little rocks piled up. The current will change when we go over them, but it doesn't look too bad. The kayaks are so easy. I'm sure we can make it and when we get around the corner, the current will probably change again…or it will be all smooth and lake water like. I'm sure of that. Smooth water will be right around the next corner.
Wait. What is that? April, are those white caps? Are we about to be in the full on fight of white rapids right here in the bahamas? Ok, just keep calm. It will be fine. We can do this. It's too late to turn around now. We are so close. Look, there is the inlet and we will be back to where we started.
Hey April, "Are you moving? I'm barely moving! This current is strong!"
I'm in my mind telling myself that this is great exercise, I'll probably be sore tomorrow, I can't wait to get to the shore. Will we ever get to the shore?
We have to go all the way around, there isn't a beach on this side. It's all rocks. Keep going, we've got this.
We finally make it to the pass. The problem with the pass is the current is meeting in the pass. There are boats that come through the pass….with motors. There are waves. Big waves. The waves are pushing us where we want to go, right? Wait. I'm turning around backwards. April is tipping. DO NOT TIP IN THE PASS!!! Get out of the pass! If we get really close to the rocks, we can sneak through. If a boat comes through, we ram into the rocks. What do we do. Get away from me! If we bump each other, we both go in. OMG, I'm nervous. She's panicked. She's using her panic words. Just get out of the pass!!!
She thinks it's a good idea to go to the pier. Hello? How will we pull this heavy kayak up onto the pier? I can not do that! There's a little piece of sand over there and what looks like a smooth concrete area that is just big enough to pull up a kayak. I'm sure that's not what it's there for….until today.
She pulls right into the right spot. I am 10 feet down the bank where there are lots of sharp rocks. I keep slamming into the shore and start to worry that the kayak will be damaged by the rocks. What if I damage the kayak? I would feel terrible! I finally get out of the thing and start dragging it across the rocks that I'm also walking on with my tender feet. I look up and April is out. Her kayak is out. She's pulling it up onto the driveway and I'm still not sure I can get mine up there. She comes down and grabs it and pulls it onto the land and then goes back to get hers out of the way. I FINALLY got it out of the water.
Now what? We are both in our swimsuits, wet hair and no shoes. We have to tell them in the office. We go in and tell Grant our brilliant idea of kayaking around the island. We're laughing and smiling…he's not. He asks how far we made it and he's jumping up out of his chair with the radio in hand. I can get the guys to get them (panic), where are they? We proceed to tell him that we got them out of the water and onto the land. His whole face and shoulders relax and he smiles this really big smile. He thought we left them in the water and they were just floating along in the caribbean!! We saved the kayaks and our lives! We didn't die and the kayaks are on the shore! Celebration!!! Then we walked all the way back to the beach with no shoes and only our swimsuits on. We were alive.
Look at this picture…do you see the current out there? That's where we almost lost it!
Subscribe to:
Posts (Atom)